Changing the chain on a bicycle: Step-by-step guide
The chain is an essential part of a bicycle and one of the most stressed components, so proper care is important. In this article, we will look at chain maintenance and repair in case of wear or breakage.
Without a well-functioning chain, you won't get far on a bike. The chain transfers power from your legs to the bike's cassette and then to the wheels, propelling the bike forward. Many of us have experienced a dropped, broken, or slipping chain, which can be particularly troublesome during rides. These problems can affect both young and adult cyclists, so it's important to pay enough attention to the chain. Safety, smooth riding, and enjoyment of cycling are paramount, after all.
When to Change the Chain on a Bicycle
Every bicycle chain has its lifespan, but this is often very individual. Generally, it is recommended to replace the chain with a new one after 1,000 to 2,000 kilometers. However, in practice, this may not always apply. The lifespan of a chain on road bikes, for example, is longer than on mountain bikes. While a recreational road cyclist can ride 3,000 to 4,000 km with one chain, an MTB enthusiast might need to replace it after just 800 km.
Factors affecting the lifespan of a bicycle chain include:
- manufacturer: The quality of chains varies between brands.
- type of bike: Chains on mountain bikes wear out faster than those on road bikes.
- riding style: Fast and aggressive riding puts more strain on the chain.
- terrain: The more challenging the terrain, the faster the wear.
- rider's weight: Heavier riders wear out chains faster than lighter riders.
- weather conditions: Moisture, water, frost, dust, dirt, mud, and sand cause quicker wear.
- maintenance: Regular cleaning and lubrication extend the lifespan of the chain.

How to Know When to Replace Your Chain
As mentioned earlier, the lifespan of a chain cannot be predicted. If the chain begins to stick or "jump," or if it breaks, replacement is absolutely necessary. To avoid unnecessary accidents, it's ideal to measure the chain's condition preventively using a chain gauge. This tool shows the percentage of chain elongation. When the value exceeds 0.75% or the gauge teeth fit between the chain rings, replacement is required.
By replacing the chain in time, you also prevent unnecessary wear on the chainring or cassette. Replacing all these components ends up being a much larger financial investment, while the chain itself only costs a few euros. A new and properly adjusted chain also allows for smoother rides and seamless, quiet shifting. Simply put, everything will run smoothly again
Step-by-Step Bicycle Chain Replacement
If the wear and elongation of the chain are too great, you can't avoid replacing it. Of course, the easiest solution is to go to a service shop where everything will be taken care of for you. However, if you want to save some money or don't want to rely on service shops, you can do it yourself. This skill can also come in handy if the chain breaks while you or your child are on a trip.
What Do You Need for Chain Replacement?
For chain replacement, you will need the following items:
- A new bicycle chain that is compatible with the type of cassette and the number of gears
- A chain breaker tool or a quick link and quick link pliers (depending on the type of connector)
- A cloth and suitable cleaning agent
- Chain lubricant
Chain Replacement Procedure
If you have everything you need, you can start the replacement. Follow these steps:
- Lift the bike so that the pedals can rotate freely. Shift to the smallest front and largest rear gear to make the chain as loose as possible. This will make the replacement easier.
- First, you will need to disconnect the old chain. If it has already broken, you can logically skip this step. :) Disconnect the chain using a chain breaker tool or quick link pliers. Remove the old chain, but keep it aside for a moment.
- Next is an intermediate step that you can skip, but we definitely recommend it. This involves cleaning all related parts of the bike, such as the chainrings, cassette, pulleys, and derailleur, using a cloth or brush and a degreasing agent.
- Next, get the new chain, which is compatible with the number of gears and cassette on your bike. You will need to shorten the new chain to the correct length, which is easiest by comparing it to the old chain. Remove any excess links using a chain breaker tool.
- Now comes the important part – connecting the new chain. You can do this either using a chain breaker tool and a connecting pin or, more simply, using a quick link. The quick link consists of two connecting plates that fit together and are secured using pliers or by pressing the rear brake and pushing down on the pedals.
- After installing the new chain on the bicycle, lubricate it as needed. Then, check the functionality of all gears to ensure the chain runs smoothly without any sticking, and make sure the derailleur does not need any adjustments.
Done! Now you can simply enjoy the smooth and uninterrupted ride once again.
How to Properly Care for a Bicycle Chain
Just like with anything else, prevention and proper care can significantly extend the life of your chain. So how should you properly care for your chain? It's not rocket science; just follow these 3 tips:
-
Keep the chain clean – After riding in mud or dirt, clean the chain using a cloth and suitable cleaning agent or a chain cleaner. Avoid exposing it unnecessarily to water and moisture.
-
Regularly lubricate – After each cleaning or periodically, apply a bit of chain lubricant. As they say, "a well-oiled chain runs smoothly."
-
Ride gently – Aggressive riding wears out the chain faster. So, unless you're a competitive cyclist, treat your bike and chain gently.
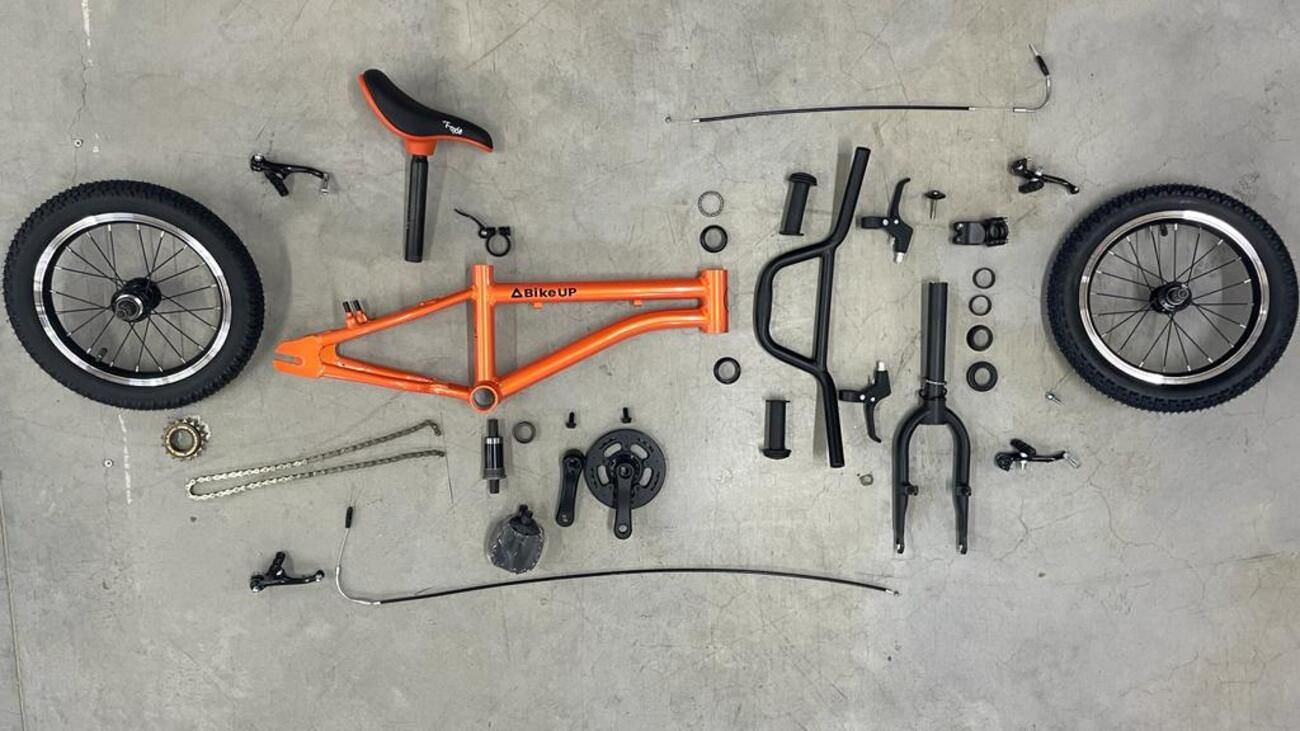
What About a BikeUP Bicycle?
Are you renting or planning to rent our orange BikeUP bicycles? If the chain gets damaged or no longer works well, you can purchase the necessary replacement parts from us at the lowest possible prices. If you feel confident in repairing it yourself, go ahead. Otherwise, simply send the bike to us in a box via courier, and we'll take care of the chain replacement or other necessary repairs. You can also purchase insurance with your subscription, which covers damage costs to the bike.